Creating professional visuals often feels like a mountain you cannot climb. You might have a great idea for a story or a product, but you lack the fancy cameras or the years of training needed to use complex software. This is where artificial intelligence steps in to level the field. You no longer need a massive budget to create content that looks like it came from a big studio. AI tools handle the technical parts of the process, so you can focus on your creative vision.
The first step in any creative project is planning. Even the best AI tools need good instructions to give you what you want. Think about the message you want to send and the style you like. You should write down a simple script or a list of scenes you need. This helps you stay organized and ensures the AI understands your goals. If you start with a messy plan, the AI will likely give you messy results.
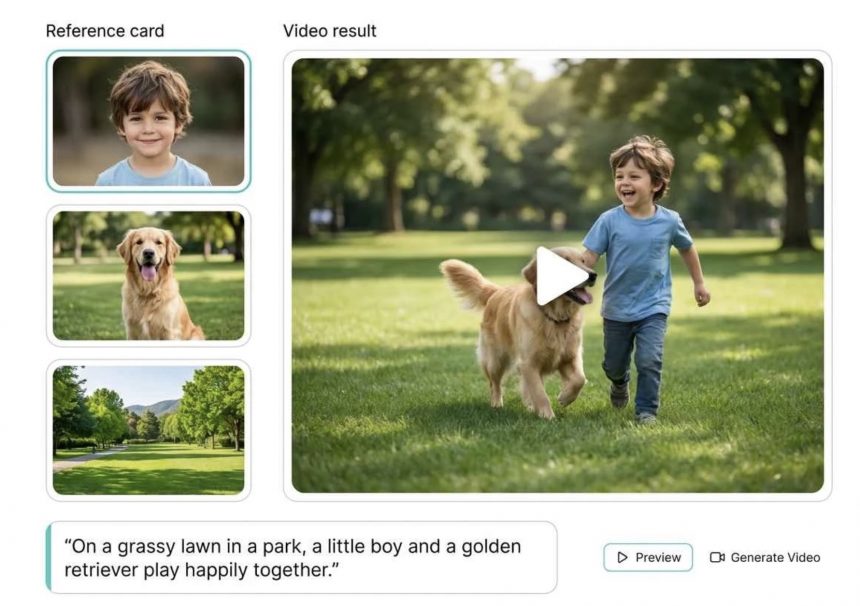
Once your plan is ready, you can start building your footage. You can produce videos without complex production by using generators that turn text descriptions into moving images. These tools save you time because you do not have to set up lights or hire actors for every small project. You just type in what you want to see, and the software builds the scene for you. This is a great way to create social media clips or background visuals for your presentations.
After you have your base footage, you might notice that some parts look a bit blurry or low in resolution. You can enhance image quality for better results by using an AI upscaler to sharpen every frame. This process adds missing pixels and cleans up noise that usually ruins a good shot. It makes your work look crisp and professional on any screen size. This is especially helpful if you are using older photos or low-quality stock footage that needs a boost.
Step-by-Step Guide to Using AI for Visuals
Step 1: Define Your Visual Style and Script
Start by deciding the look you want. Do you want something realistic, or do you prefer a cartoon style? Write a short script that describes each scene in detail. Mention the colors, the lighting, and the movement you want to see. Having this written down makes it much easier to talk to the AI software later.
Step 2: Generate Your Initial Assets
Input your descriptions into an AI video or image generator. If the first result is not perfect, do not worry. You can adjust your words and try again. Most people find that adding more specific details about the camera angle or the time of day helps the AI produce better results. Try to generate a few different versions so you have options to choose from during the editing phase.
Step 3: Upscale and Sharpen
Take the images or video clips you generated and run them through an enhancement tool. AI upscalers are great because they do not just stretch the image. They actually understand what the objects in the picture are supposed to look like. They can make hair look more detailed or make text easier to read. This step ensures that your content does not look cheap or pixelated when people view it on large monitors.
Step 4: Edit for Flow and Clarity
Bring all your sharpened clips into an editing program. Many modern editors use AI to help you find the best parts of your footage. You can use automated tools to sync your video to the beat of your music or to remove background noise from your voiceover. This makes the final product feel much more polished and professional.
Step 5: Final Review and Export
Watch your video from start to finish. Look for any weird glitches that the AI might have left behind. Sometimes AI makes small mistakes with hands or backgrounds. If you see something odd, you can go back and regenerate that specific part. Once everything looks right, export your file in a high resolution like 4K to keep all that new detail you added.
Tips and Best Practices
Use Specific Prompts
When you talk to an AI, be as clear as possible. Instead of saying a man in a forest, say a young man wearing a red jacket walking through a foggy pine forest at sunrise. The more details you give, the less the AI has to guess. This leads to results that actually match what you have in your head.
Keep Lighting Consistent
If you are making a video with multiple scenes, try to keep the lighting the same in each one. If one scene is very bright and the next is very dark, it will look jarring to the viewer. You can tell the AI to use soft natural lighting for every prompt to ensure everything looks like it was filmed at the same time.
Focus on Resolution
Always start with the highest resolution possible. Even though AI can upscale images, it works best when it has a good foundation. If you start with a tiny, blurry thumbnail, the AI might struggle to figure out what the image is supposed to be. Give it a decent starting point, and the results will be much cleaner.
Common Mistakes to Avoid
Do Not Over-Process Your Images
It is easy to get excited and turn all the AI settings to the maximum level. However, this can make people look like plastic or make landscapes look fake. Aim for a natural look. If an image looks too smooth or too sharp, dial back the settings a little bit. You want your audience to focus on your message, not on the fact that you used AI.
Avoid Ignoring the Background
Sometimes the AI focuses so much on the main subject that the background becomes a mess of weird shapes. Always check the corners of your images and the edges of your videos. If the background looks distracting, you can use AI tools to blur it or replace it with something simpler. A clean background helps your main subject stand out.
Do Not Skip the Human Touch
AI is a powerful assistant, but it is not a replacement for your own judgment. Always review what the software creates. You might need to change a color or move a clip to make the story make sense. The best content comes from a mix of fast AI processing and careful human editing.
Avoid Using Vague Language
Words like good, nice, or cool do not mean much to a computer. Use descriptive words that relate to physical things. Use words like metallic, rough, bright, or blurry. This gives the AI a better idea of the textures and light levels you want to achieve in your final project.
Conclusion
AI tools have changed the way we think about making videos and images. They take away the technical barriers that used to stop people from sharing their ideas. By following a simple workflow, you can create high-quality content that looks professional and sharp. Remember to plan your project carefully, use specific prompts, and always double-check the final results for quality.
Using these tools allows you to work faster and dream bigger. You can experiment with different styles without spending a lot of money on new equipment. As you get more comfortable with the software, you will find new ways to make your visuals stand out. Start small, practice often, and you will soon be creating stunning videos and images that capture everyone’s attention.